|
|
I have been asked by numerous people how I set up my station with my PCR-1000 Receiver from Icom. Well, I decided to show how I did it. If you are interested in making your tuner available on RemoteHams, continue reading. I will walk you through the steps I took to get my PCR-1000 available. These steps apply to the PCR-1000. Other radios such as SDRs and Transcievers will have other setup steps. You might want to refer to the RemoteHams forum for more information.
Below are the steps that took to get my PCR-1000 available on RemoteHams.
|
1. The first step is to register for an account. This will you to access the RemoteHams forums, gain access to remotes, join clubs and interact with the community! And you will need it to install the required server software on your PC.
|
|
2. I recommend that you also download the RemoteHams RCForb Client softare. This allows you to select and listen in on the various different radios available. The latest version at the time of this writing is RCForb_Client_0.8.5605.exe. Updates are periodically made available. The software will notifiy you if an update is available.
Download at: |
|
3. To serve your PCR-1000, you will need the RCForb Server software. The latest version at the time of this writing is RCForb_0.7.5605. Updates are periodically made available. The software will notifiy you if an update is available. .
Download at: |
|
4. The next critical piece of software to obtain is Ham Radio Deluxe (HRD). Ham Radio Deluxe is a popular freeware amateur radio program suite that allow remote control of most popular transceivers using CAT interface. This software is the interace between the PCR-1000 and the RCForb server software. The RCForb server software alone can't control the PCR-1000. HRD has and IP server utility in it so that you can control the radio through RCForb Server.
You do not need to use the for purchase version. You can use one of the older versions of the software. I am currently using version 5.24. Older versions of HRD can be downloaded from IW5EDI's website. |
|
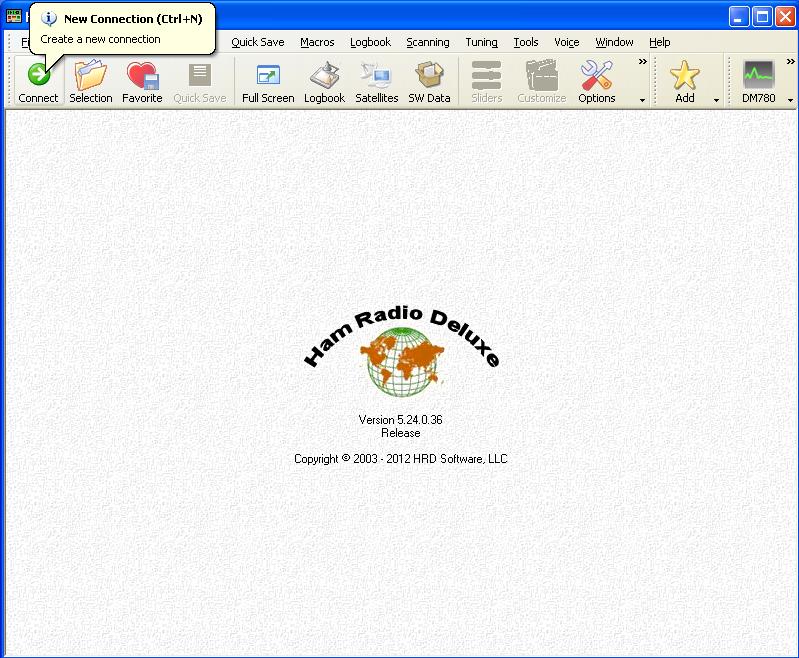
5. For the moment, let's get HRD to recognize the PCR-1000 and then set up the HRD TCP port for remote control. Start the HRD program so you get to the screen shown on the right.
|
|
6. Click the 'Connect' icon so that we can connect to the PCR-1000. Do make sure that the PCR-1000 is turned on and that you have a serial or USB cable connected between the PCR-1000 and your computer.
|
|
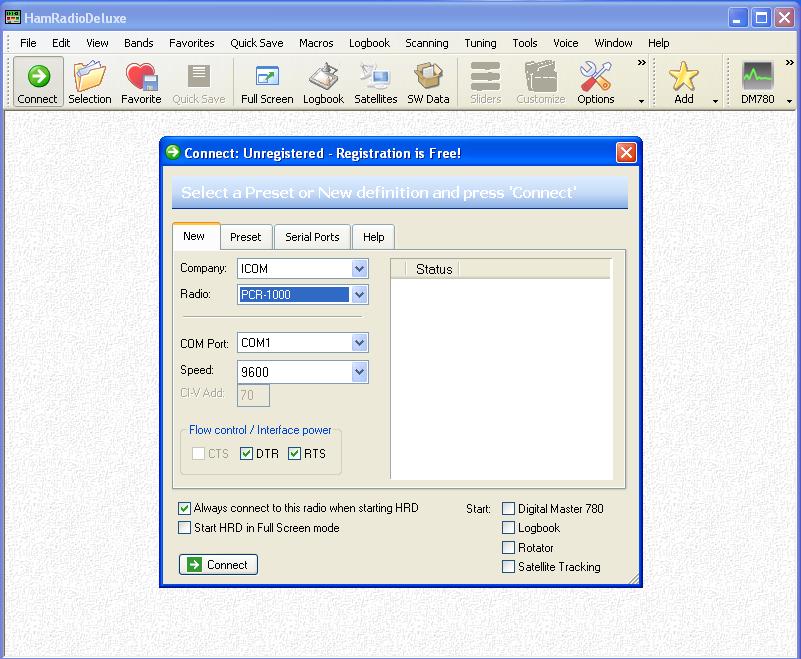
7. We need to add the PCR-1000 to the list of devices that you want to connect to. When you hit the connect button, the following screen appears as shown to the right. Use th pull down menus to select Icom and the PCR-1000. Make sure the DTR, and RTS buttons are checked. You might also want to check the "Always connect to this radio when starting HRD" so that HRD always connects to the PCR-1000 on HRD startup. Go ahead and hit connect. You should be connected to the PCR-1000. Go ahead and try to tune around on the PCR-1000 to make sure that the software is controlling the radio.
|
|
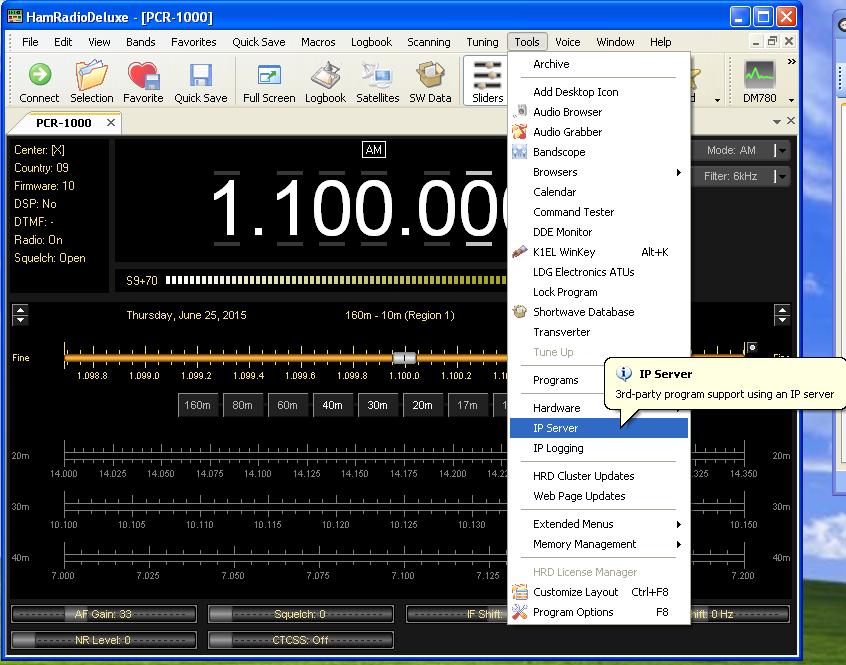
8. Once you are satisfied that everything is working in HRD, there is one more thing you need to do. You need to set the IP port for HRD so it can talk to RCForb server.
Click Tools on the menu bar and select IP Server.
|
|
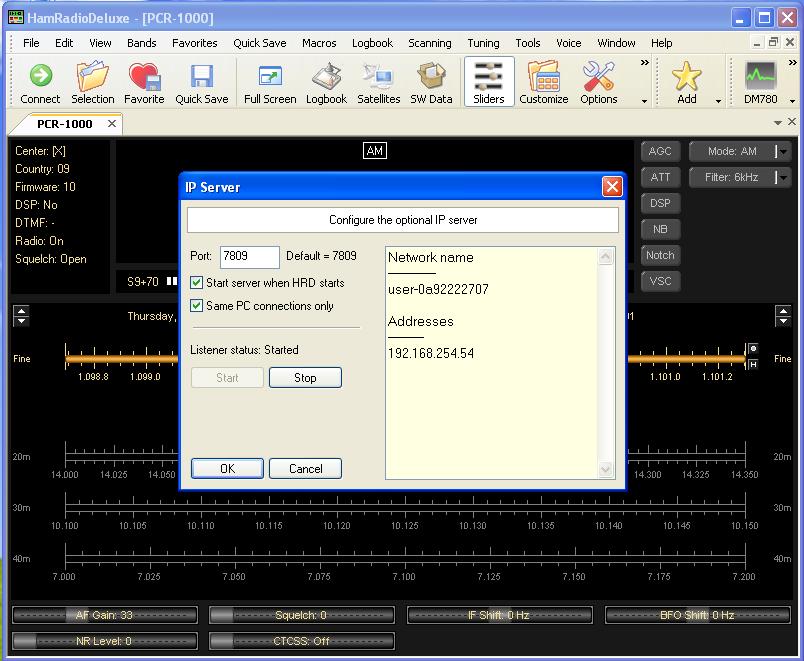
9. The IP Server window opens. The default port setting is set to 7809. You can change this to another port value but do make sure you remember this value. You will need to enter it into the RCForb server softare. It's also a good idea to make sure that the "Start server when HRD starts" is checked. I also have the "Same PC connections only" checked as well. When you are finished hit OK.
|
|
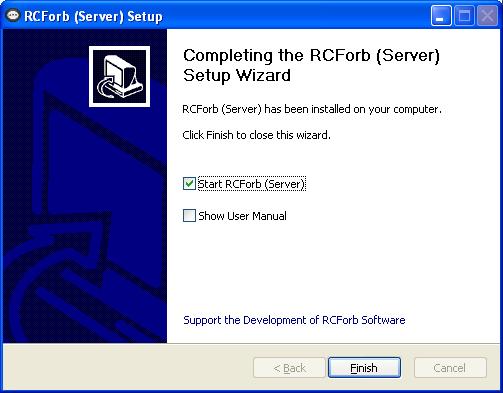
10. At this point, you are ready to install the RCForb server software. Where you saved the download of this software, go ahead and run this executable to start the install. Accept the terms of the install as well as completing all of the install requirements. Follow all prompts as required. At the end of the install, you will be asked to start RCForb (Server). Go ahead and check the box, and hit Finish to launch the software.
|
|
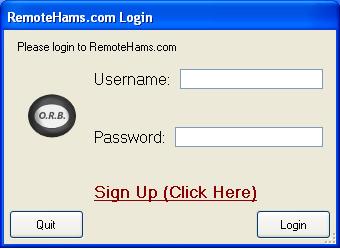
11. SInce this is a first install, the server software will ask you to login to RemoteHams.com. So go ahead and type in your username and password that you created in Step 1. The software will check for your credentials on the system.
|
|
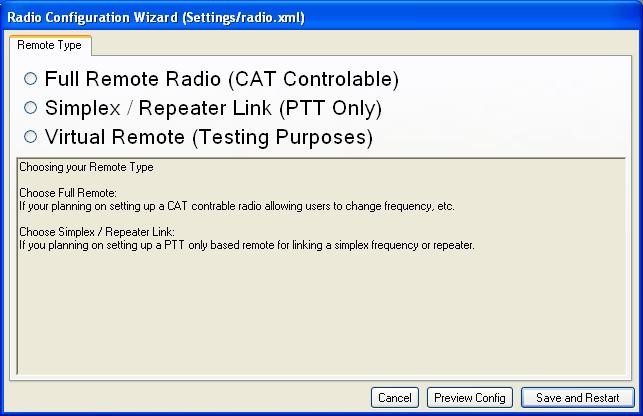
12. The software will then take you through the Radio Configuration Wizard. The first window is the Remote Type. For the Icom PCR-1000, select Full Remote Radio (CAT Controlable). Hit "Save and Restart".
|
|
13. After the software has restarted in step 12, the next window at appears is the Audio Settings window. Do make sure you are using VOIP port 4524 here. Selct the sound card system for your Microphone and Speakers. You can pretty much copy what I have selectyed as shown on the right. This is the minimum needed for the setup. Next click on the Server Setup Tab.
|
|
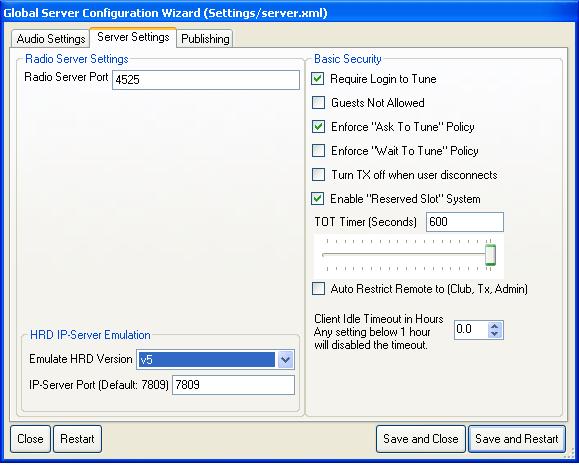
14. In the Server Settings tab, I use Radio Server Port 4525. I would also check those check boxes I have checked under Basic Securit. That works well for my radio but you might experiment with others. Also make sure that you select v5 from the Emulate HRD Version dropdown. Make sure the IP-Server Port is set to what you set in HRD. The default is 7809. See step 9. Finally, select the Publishing tab.
|
|
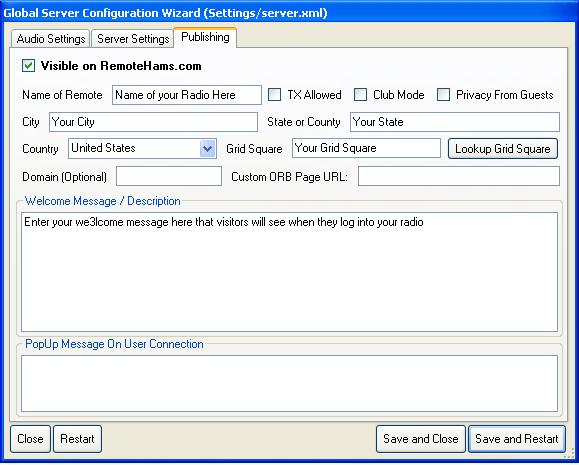
15. In this tab, do make sure that the Visible on RemoteHams.com is checked. Otherwise, your radio will not be visible on the listing of radios available. You can then name your remote and fill in the City, State or County, Country, and Grid Square blocks so people will know where your radio is located. You should also add a welcome message as well when people log into your tuner. Great chance to introduce yourself.
Once this is completed, go ahead and hit Save and Restart. The server should start.
|
|
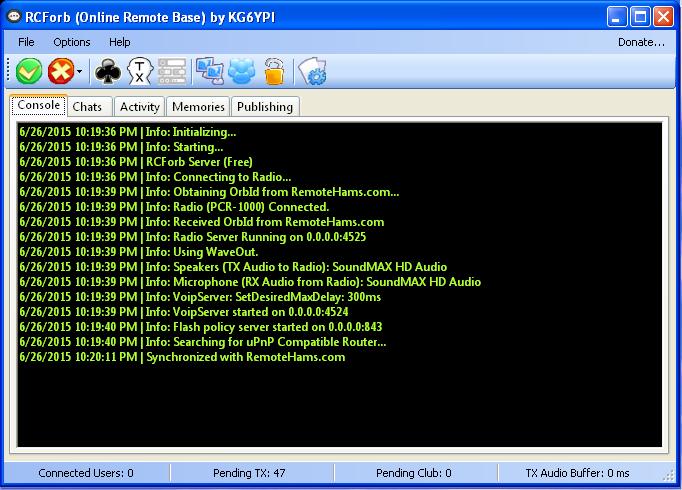
16. IF RCForb server starts correctly, you should see a window like that shown to the right. If you get this, then you are almost ready.
|
|
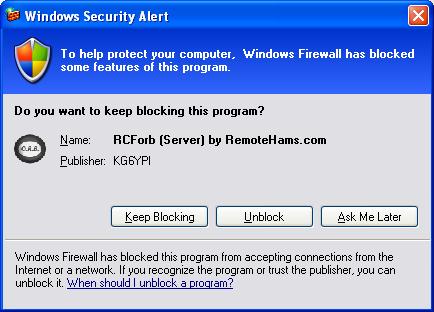
17. It is possible for first time installs that you might get the message window as shown on the right. If you get a window like this, do make sure you hit Unblock so the server is not blocked by Windows and gets through the Windows firewall.
|
|
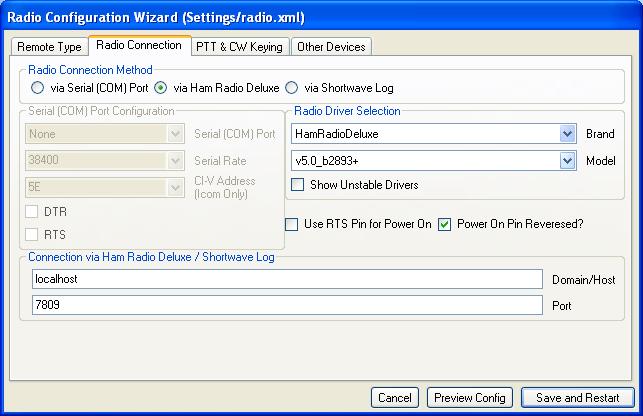
18. There are some other settings that need to be made. In the main menu of the software, click Options and select Radio Configuration. Make sure you are looking at the Radio Tab as shown to the right. I would copy the settings that I show since I am usg HRD as the interface and connection method to the radio. Do select v5.0_b2893+ from the Model dropdown selector. Make sure that the Connection via Ham Radio Deluxe / Shortwave Log port matchs the port you are using for the IP Server in HRD. When finished, hit Save and Restart.
|
|
19. In order for your radio to be visible over the internet, you will need to 'port forward' (3) three TCP ports on your router. They are:
a. A TCP port 843 for a Flash policy server (the web version of RemoteHams use flash). b. A TCP port for the VOIP port you set in the Audio Settings window. c. A TCP port for the Radio Server Port you set in teh Server Settings window. HRD uses TCP 7809 for remote control. You could open that up too, then anyone with HRD could control your radio too. I normally don't allow that. Check the instructions for your particular router
|
|
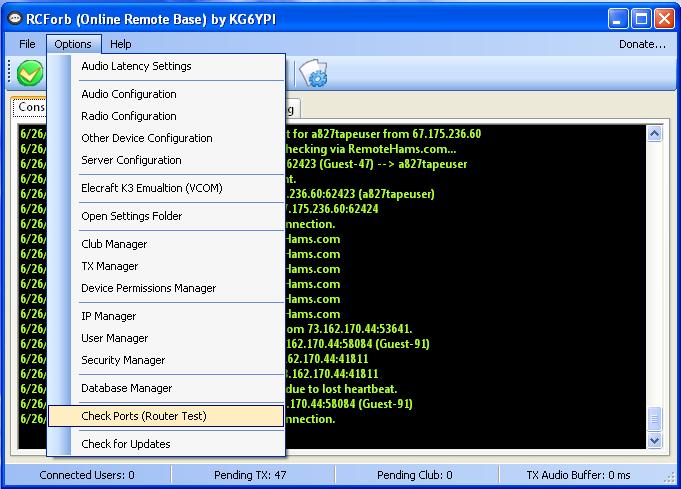
20. Once the server software has restarted, and you have port forwarded the three ports in your router, it's a very good idea to check the ports to make sure the ones you selected are available to use. From the Options menu, choose Check Ports (Router Test) as shown to the right. Follow the instruction to run the test.
|
|
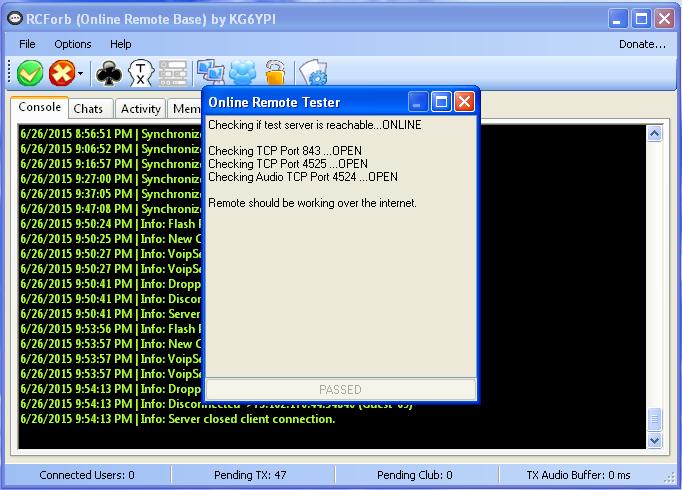
21. If everything works, you should see the results of the test look similar to those shown to the right. Hopefully you got this. If you got errors, go back and check your port forwarding settings in your router and make sure the ports you are using are indeed available.
Hopefully your test passed and that the message that the Remote should be working over the interent appears. If you get this, you are almost done. Keep the software running at this time.
|
|
22. It's time to check to see if your radio is showing up in the RCForb Client software. If you have not done so install, the RCForb Client software right now. You should have downloaded this in Step 2.
Keep the software running at this time.
|
|
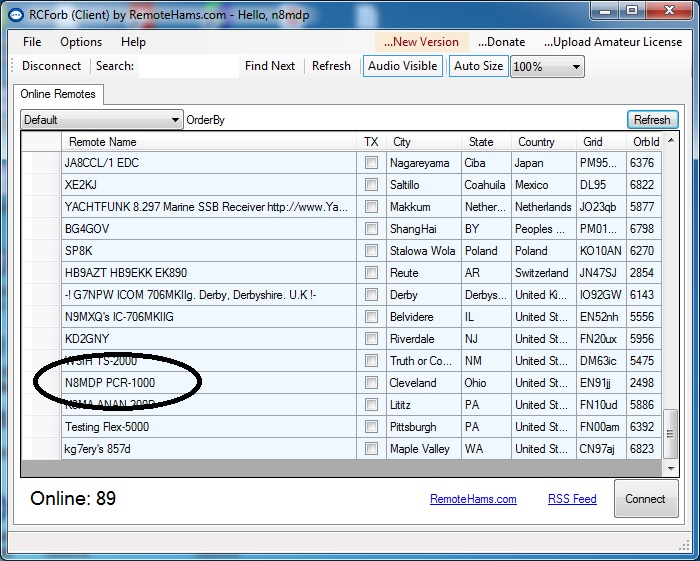
23. Start the RCForb Client software. Once open, you should see a list of Remote radios available. If you look through the list, you should be able to see your radio under the Remote Name that you set. I show mine to the right.
Keep the software running at this time.
|
|
24. Unfortunately, you can't select your radio from the list in order to listen to it. This list assumes you are outside of your firewall and your router. You will probably need to have a friend check out your radio from their computer outside of your firewall. If you want me to try it, send me an email and I will help you.
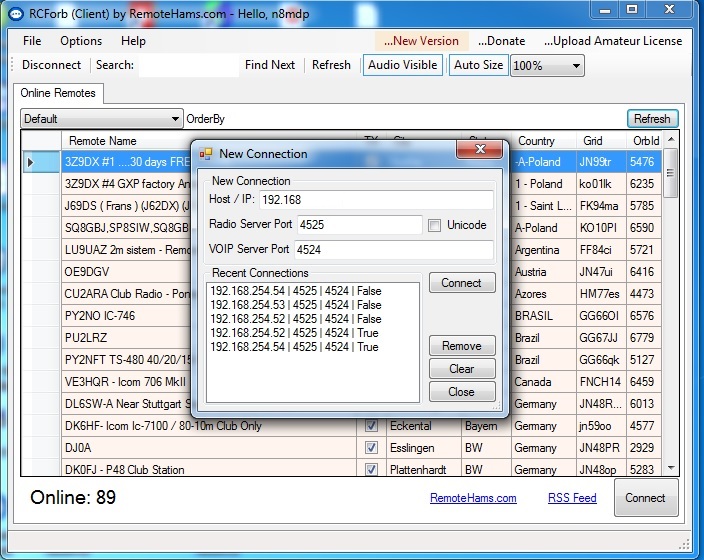
But there is a way to try your radio behind your firewall using the RCForb Client software. Using the Client softwre, select File from the main menu bar, then select New Connection. You will get a window as shown to the right.
|
|
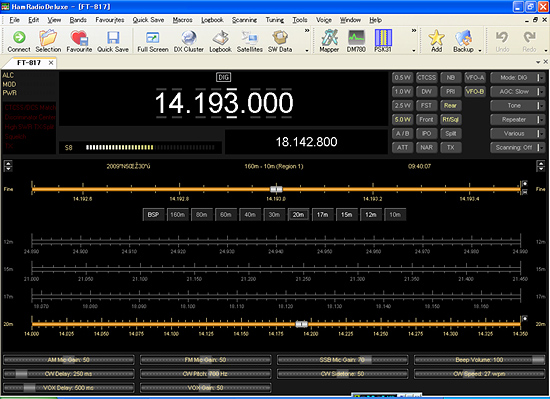
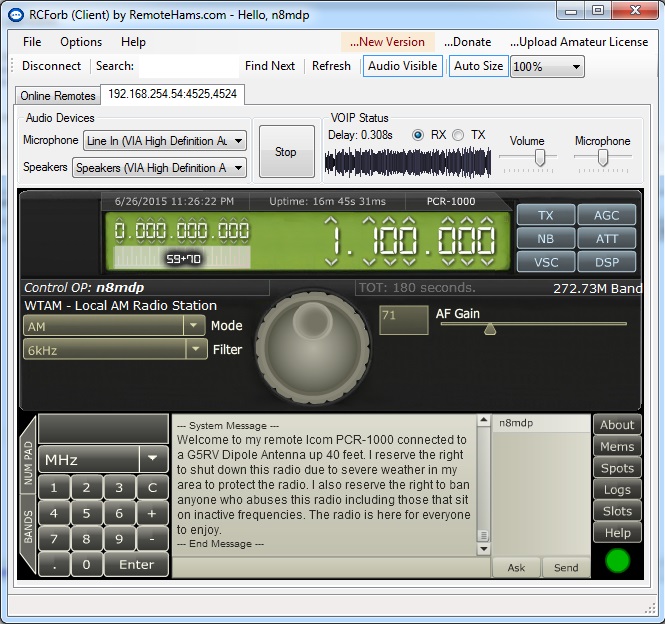
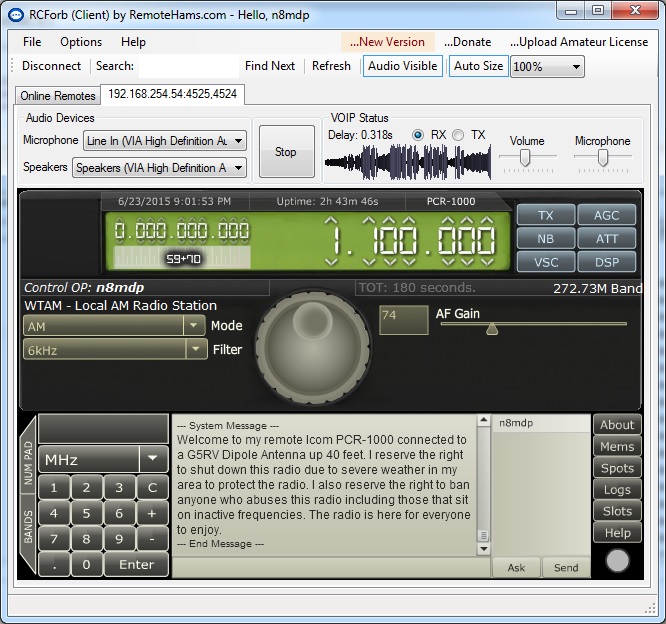
25. In the New Connection window, enter in the IP address of the computer the radio is connected to, the Radio Server Port you chose, and the VOIP port that you used. Then hit connect. If all goes well, you should connect to your radio and get a radio skin similar to what I get to the right.
|
|
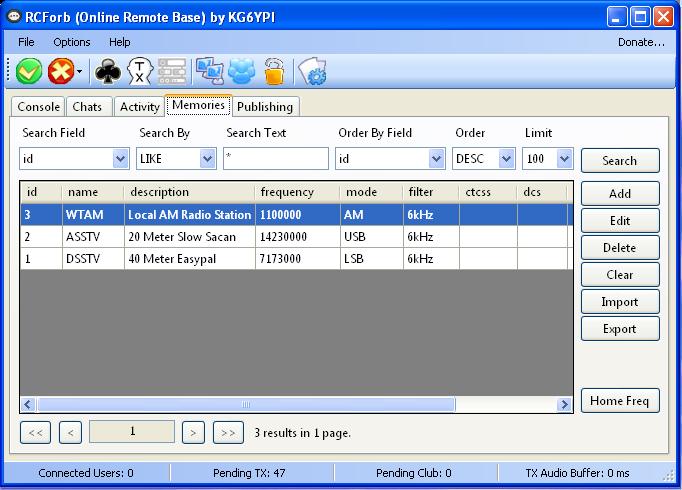
26. One final adjustment that you might want to do is to set a memory list of frequencies. I do this to set a default frequency that the radio always returns to when nobody is listening to the radio. To do this, hit the Add button.
|
|
27. A window will pop up that will allow you to add (or edit an existing) frequency. You can give the frequency a name, set information about the frequency, set the frequency, mode, and filter. You should also check the 'Use as Home Frequency' checkbox so that this frequency becomes the default home frequency. Hit Save when you are done.
|
That's it. If everything goes well, your PCR-1000 is now live on the RemoteHams server system. I encourage you to explore the server software to set other settings so you can optimize the setup to your liking.
© 2026 , Jonathan Tucker N8MDP. All Rights Reserved.